FlyFysher
Royal Wulff
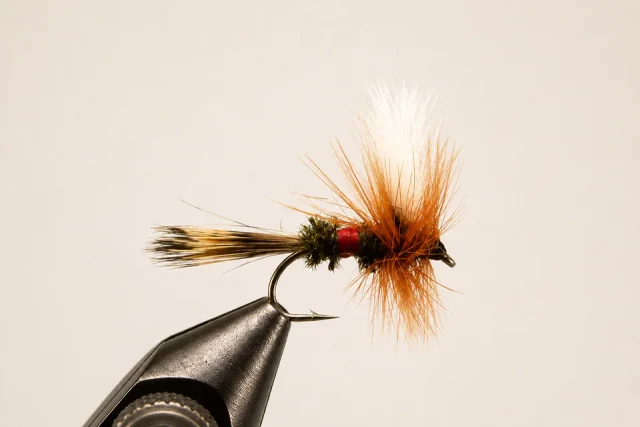
White upright wings, brown hackle, and a bright red waist. A buoyant attractor for broken water.
The Royal Wulff is an attractor rather than a close copy of one insect. The divided hair wings and stiff hackle give it a recognizable silhouette. At the vise, the challenge is keeping those wings upright while leaving room for a compact, three-part body.
- At the vise
- Intermediate
- Common sizes
- #10–16
At the vise.
Work through the numbered steps in order. Use the written materials and proportions as your guide; select an image for a closer look.
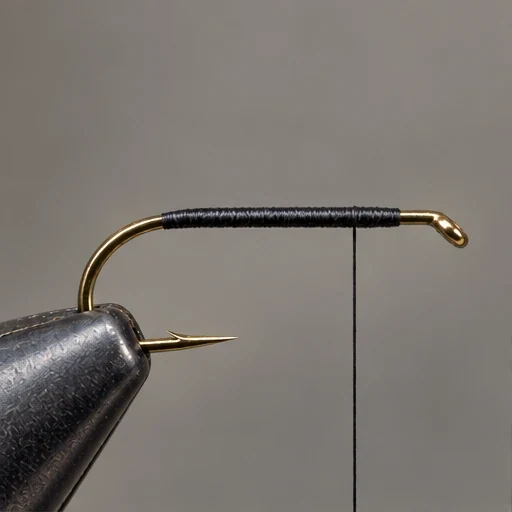
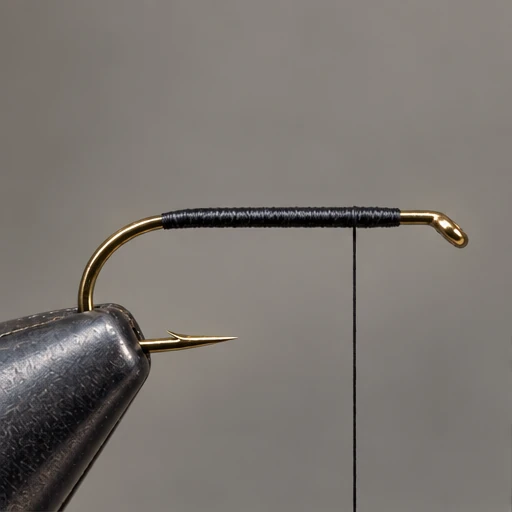
Lay a thread foundation
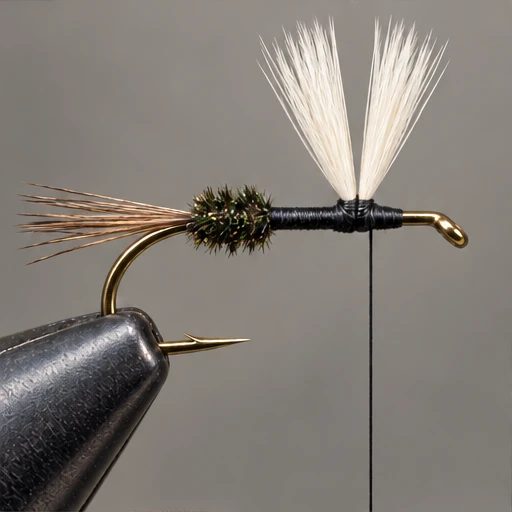
Clamp the hook level. Start black thread behind the eye and cover the shank. Return to the wing position, about three-quarters of the way forward from the bend.
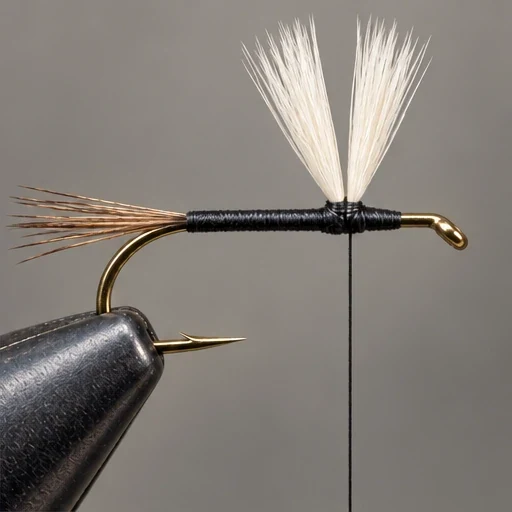
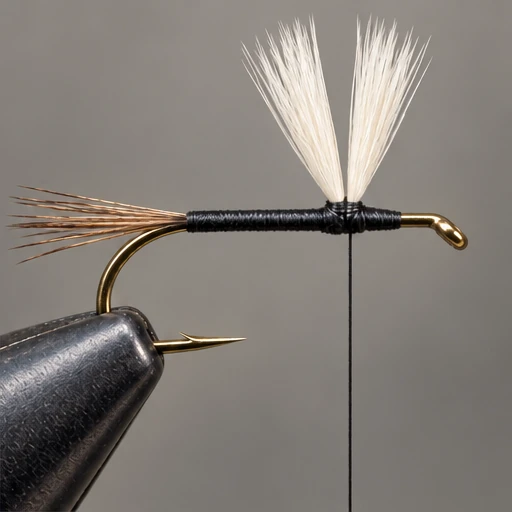
Set wings and tail
Tie in calf hair with tips forward, measuring one shank long. Trim the butts on a slope. Raise, divide and secure two upright wings with figure-eight wraps. At the bend, attach a moose-hair tail one shank long; cover the trimmed butts smoothly.
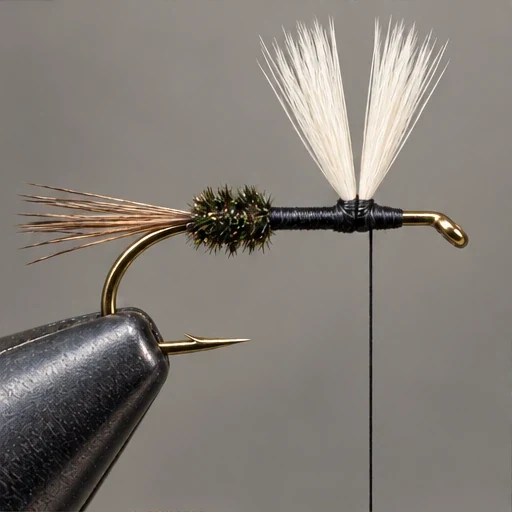
Wind the rear herl
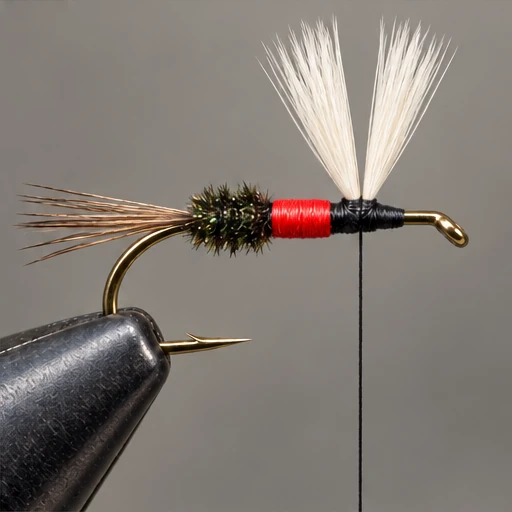
Attach peacock herl at the tail base after removing fragile tips. Gently twist the strands together and wind a short rear body section. Secure and trim.
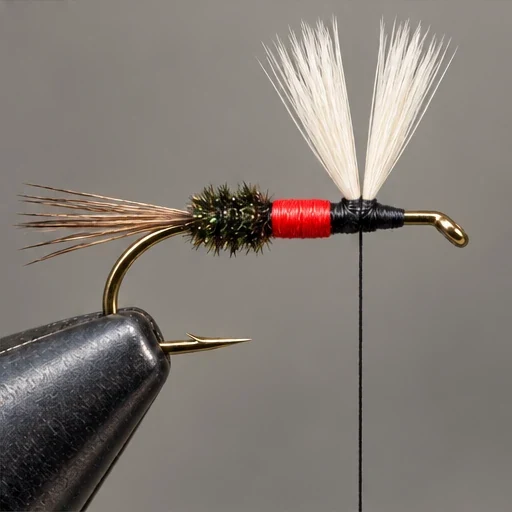
Build the red band
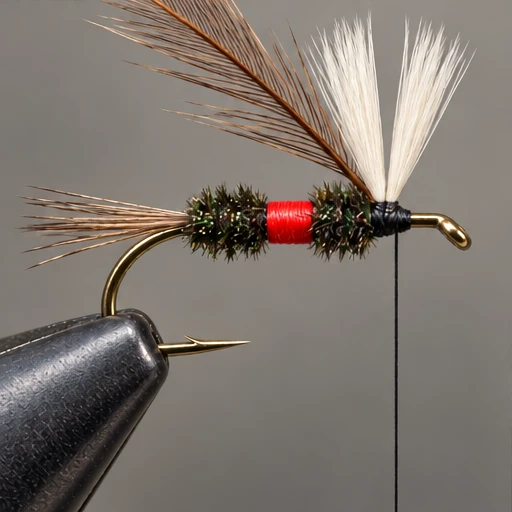
Tie in red floss and wind a smooth center band. Keep room behind the wings for another short herl section. Tie off and trim the floss.
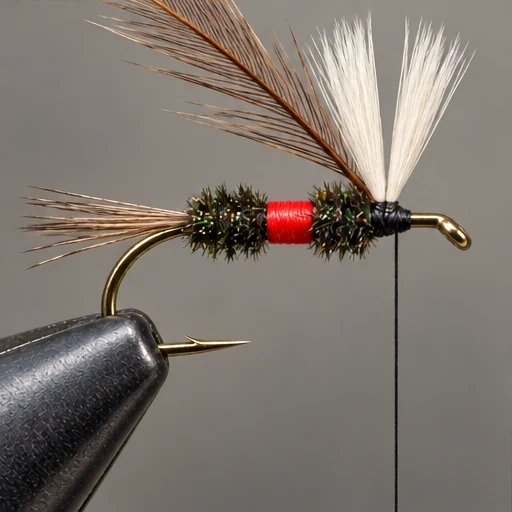
Add front herl and hackle
Wind a second short peacock section to complete the three-part body. Tie the prepared brown hackle stem just behind the wings, leaving room for wraps on both sides.
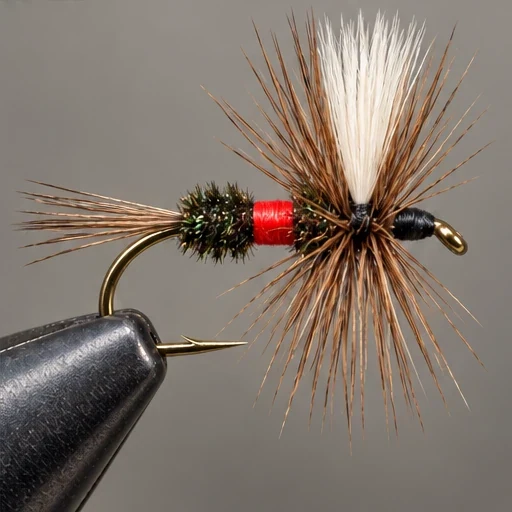
Hackle and finish
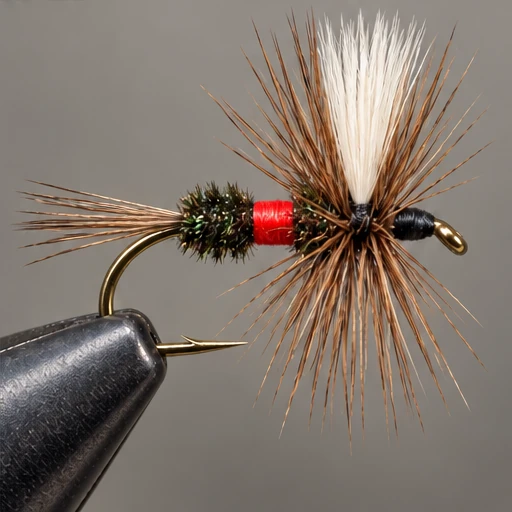
Wind roughly three or four hackle turns behind the wings and three or four ahead. Secure the tip, trim, and form a compact head. Whip finish and cement without blocking the eye.
On the water.
Try it on riffles and pocket water where a buoyant, visible dry fly is useful. Dress the dry materials with floatant and look for a drift that moves with the current. A visible fly is easier to follow, but drag can still spoil the presentation.
Find your Royal Wulff.
Have this pattern tied for your water.
No versions are listed yet. Choose a tyer and ask about your sizes, colors and materials. The tyer must confirm availability and send an offer.
Recipe references
Materials and tying methods may vary between versions. Compare the sources below for this dressing.
Portrait reference
Pattern dressings vary; use the written recipe for exact materials and proportions.